When pre-recording your talk for a lecture, meetup or a conference, here are the steps you need to follow:
How to:
- Set-up etiquette
- Prepare audio
- Prepare for video
- Join a meeting and record
- End and save the recording
- Download and install or update Zoom
- Use a headphone which has an in-built microphone for better audio quality.
- Move to a quiet place while recording. Make sure to put your PC and mobile on DND to avoid unnecessary pop-ups and notification sounds.
- Ensure that your environment is well-lit, and the background is clean. If you can, use a green screen to cover the background environment. Alternatively, use a virtual background, but make sure the background is simple and doesn’t take the viewer’s attention away from the talk.
- Aspect ratio of the slides should be 16:9 to maintain consistency.
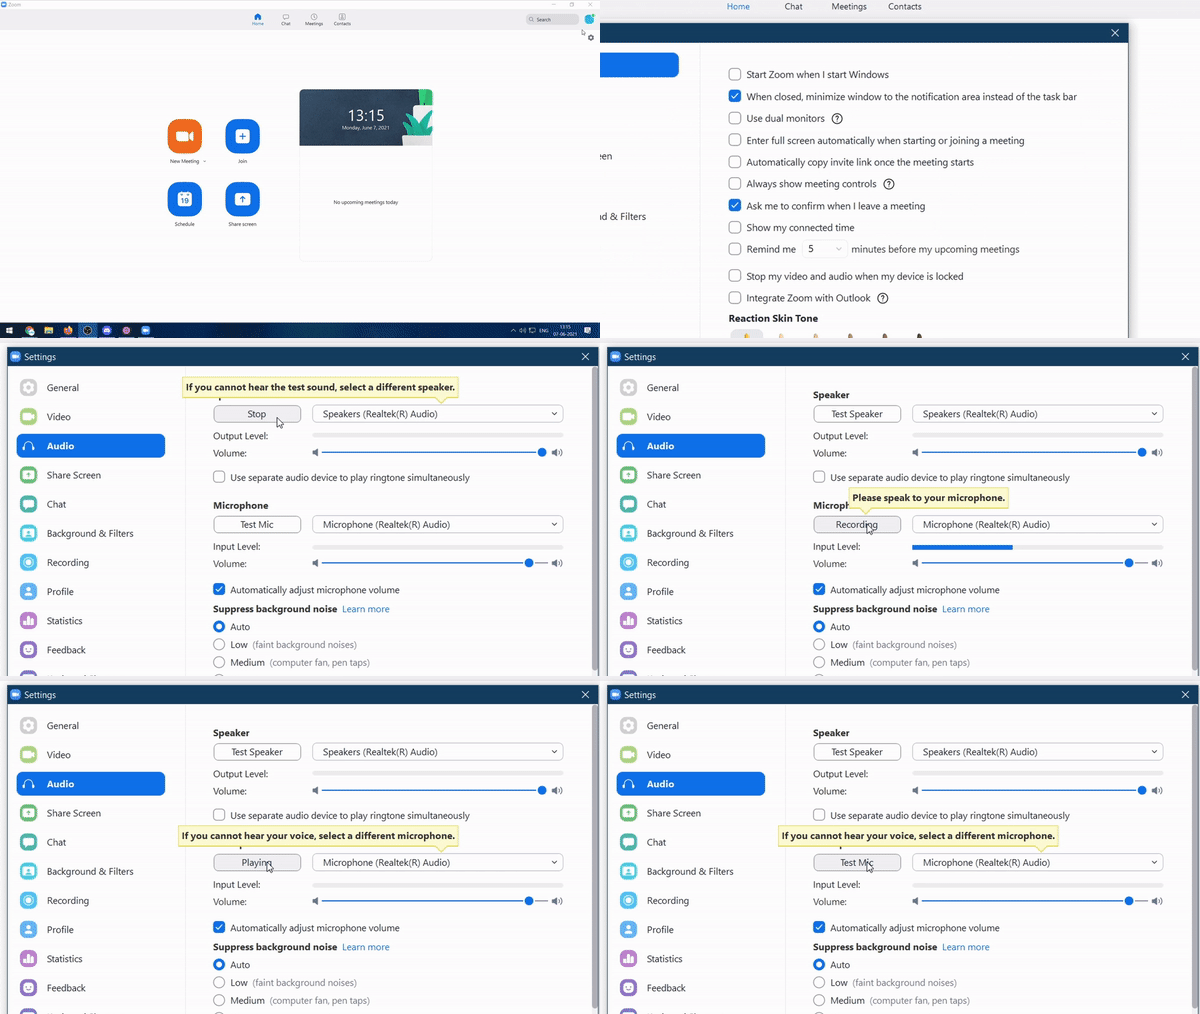
- Open Zoom --> settings --> audio.
- Test speakers.
- Test microphones.
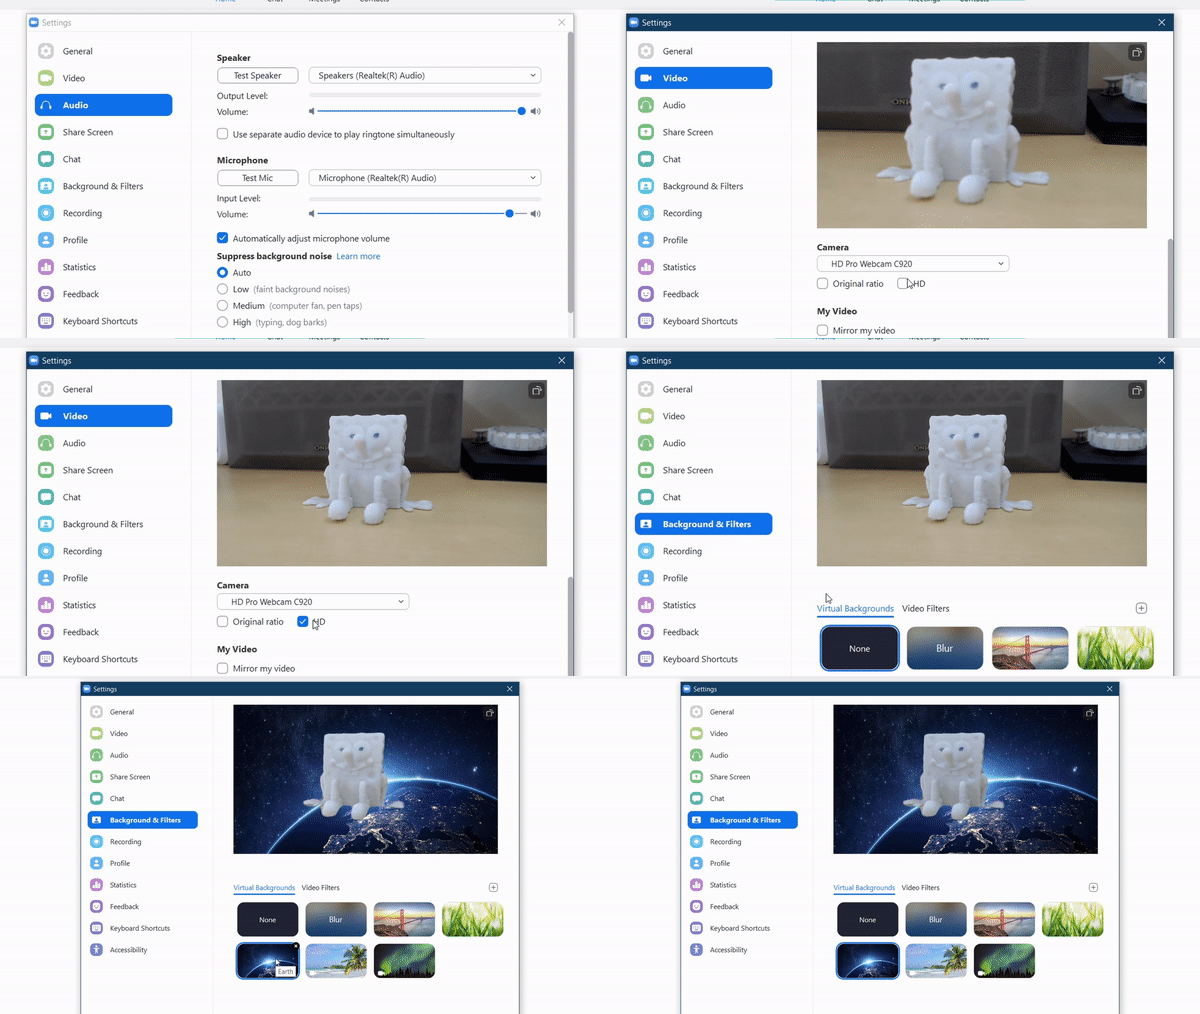
- Settings --> video: enable HD.
- Settings --> background and filters: select a virtual background, if required.
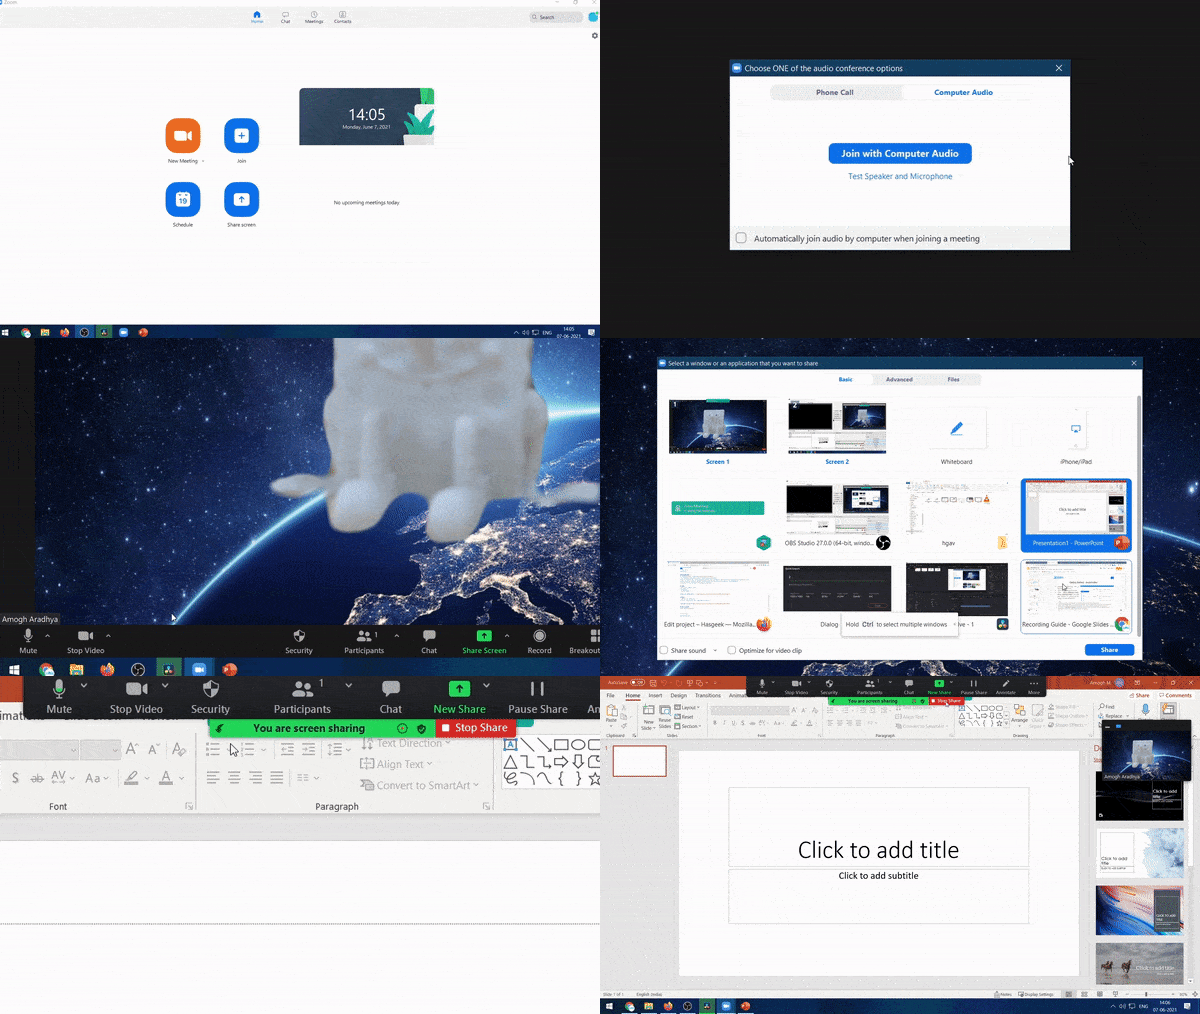
- Join a meeting. Or create one by clicking on the “new meeting” button.
- Start sharing the screen.
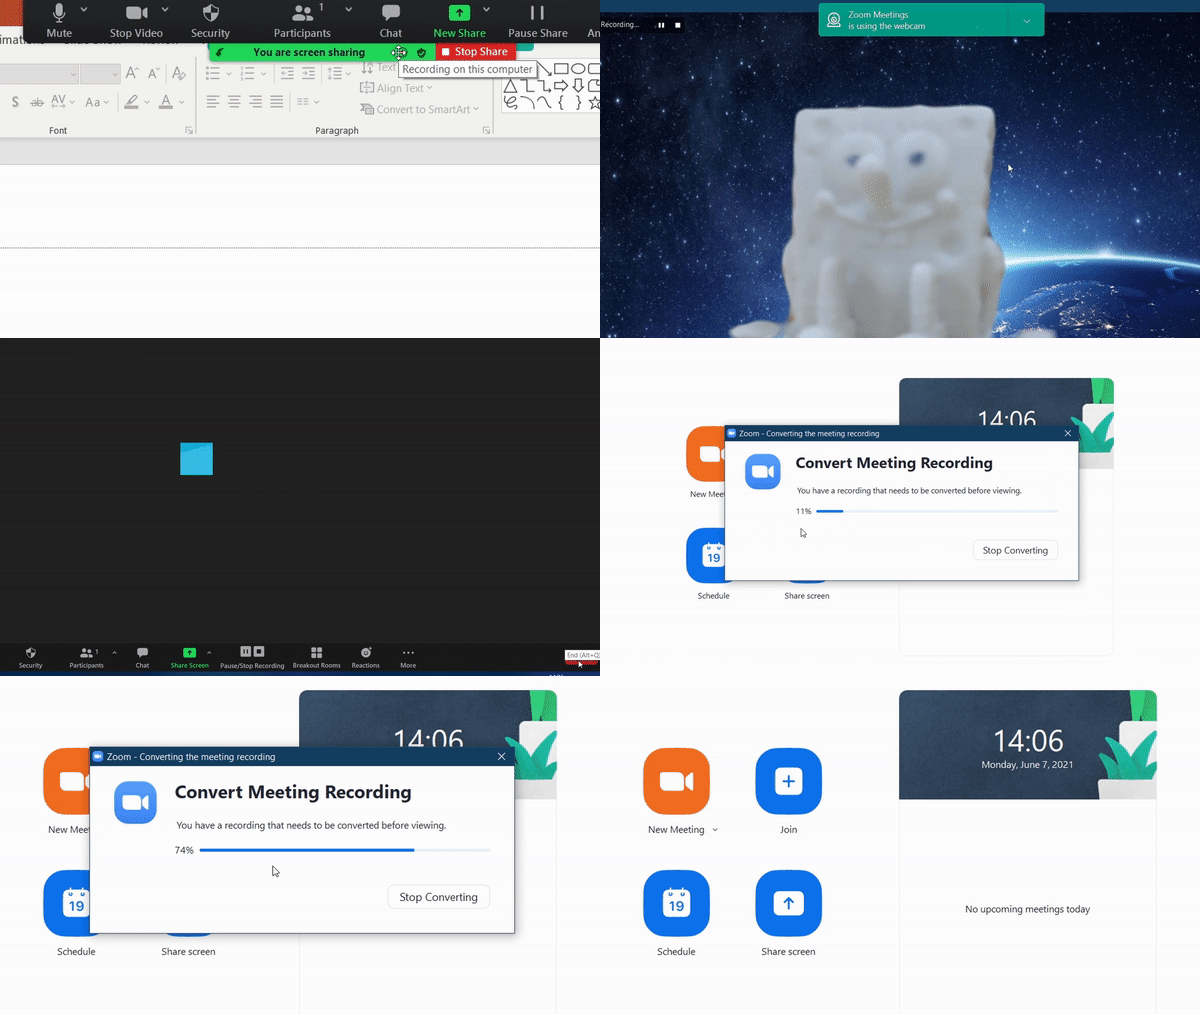
- Click “record”.
- Once you have finished speaking, pause for 15-20 seconds. Stop the screen share and end the meeting.
- Your talk’s recording will start to process. The recording is usually saved in the documents folder of your PC. It will take some time to process the recording, depending on the length. Until the recording is processed and saved, DO NOT switch off your PC.
Once recording is saved, upload it to Google drive and share the link with the organizers. If you face any other issues while recording, please contact your administrator or get in touch with us.
{{ gettext('Login to leave a comment') }}
{{ gettext('Post a comment…') }}{{ errorMsg }}
{{ gettext('No comments posted yet') }}